This versatile tool will help you solve a variety of PC problems.

This tool has multiple spheres of application. It not only helps you to fix typical PC errors but also prevents losses of your files, as well as failures of hardware and damages caused by malware. The tool can be employed to optimize the performance of your PC, allowing you to use its potential to the fullest extent. This is the quick way to fix any issues with its assistance:
1. Obtain the PC Repair Tool by downloading it on your computer.
2. Click on the “Start Scan” button. This step lets you find out if there are any Windows issues.
3. Once you see a list of issues, click on the “Repair All” button. Please be informed this option requires an upgrade.
In comparison with the previous versions, Windows 10 has a greatly improved booting time. But if you want the system to load really fast, you should try transferring it from a standard HDD drive to an SSD. Besides, this will boost the overall performance of Windows 10 on your PC. This article will review the possible ways of moving all your system data to an SSD from the HDD.
The simplest solution available is installing the system on the SSD from scratch. But such a clean installation will wipe out your data, so you’ll have to reinstall all the programs anew. Installing Windows 10 from scratch could also take a longer while than moving the already installed OS. However, if you don’t feel like experimenting, this path is for you. There’s essentially no difference between a fresh installation of Windows 10 on an SSD and an HDD. First, you need to format the drive partition your system is situated at. Next, perform the clean install on your new SSD.
If you don’t feel like losing all your system data and programs is a good idea, you could move the already existing system to the new SSD. Essentially, you just need to “clone” your system to the new drive. However, it’s not so simple and requires some work to be done on the user’s part. Read below for detailed instructions on how to transfer your OS to a clean SSD.
Before you proceed, though, please make sure to backup all important data.
How do I transfer Windows 10 to a new SSD avoiding reinstallation?
Here’s a brief summary of all the steps you need to take: 1) back up everything from your current drive; 2) “shrink” the disk space; 3) clone the current system partition to the new SSD; 4) format the old system partition on the HDD.
Once the backup is locked and loaded, your next step is to minimize the used disk space. As you know, an SSD is fast but offers a more limited disk space. Make sure the partition currently used by your system isn’t bigger than your SSD space. Try to “shrink” the partition to the smallest possible size. Delete any large personal and non-system files. Don’t worry, you won’t lose your personal stuff. Once the installation is done with, you will be able to restore everything from the backup.
When the system partition becomes small enough to fit on your new SSD, it’s time to initiate the transfer. The most convenient way is to download and use this specialized software: EaseUS Todo Backup. Experts recommend you should perform a defragmentation of the drive your system is on before transferring it to the clean SSD.
Below are the detailed step-by-step directions on how to move your Windows 10 from the old HDD to the new SSD:
1. Open the EaseUS Todo tool;
2. Have a look at the left sidebar and find the “Clone” button;
3. Select the “Disk Clone” option;
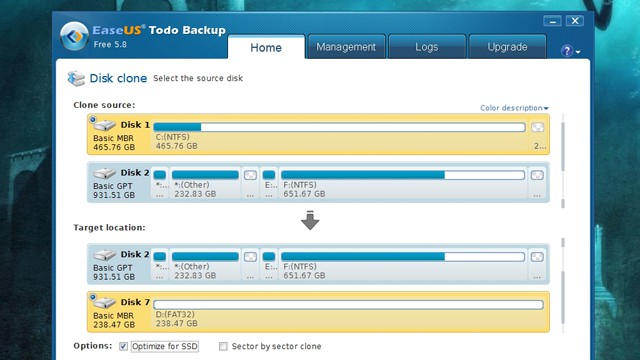
4. As the clone source, choose the HDD your system is installed on. Set the SSD drive as the target location;
5. Put a tick in the “Optimize for SSD” box. This will make sure the content of your partition is “properly formatted” to be moved to your SSD.
6. Click on the “Next” button;
7. At this point, the EaseUS program will start cloning your disk. If you want your PC to turn off automatically when this procedure is over, put a tick in the “Shut down the computer when the operation completed” box.
The only possible error that can interrupt this process occurs when your drive turns out to be too big for the SSD. If you see that error, delete some more files from the HDD partition. If the transfer is finished without any errors, that means your system has been successfully moved to the SSD. The next step is to wipe out the old HDD partition.
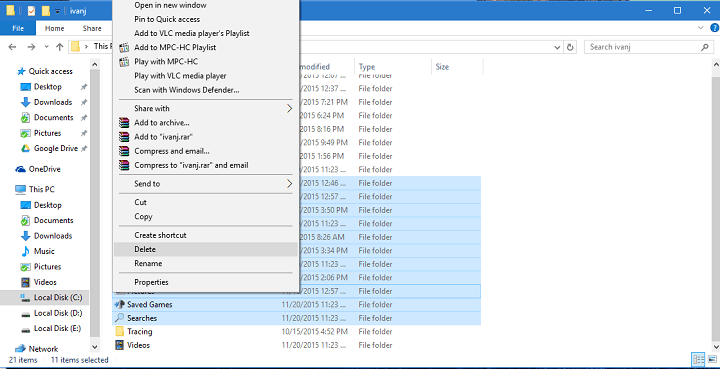
This is what you have to do in order to clear the source drive that contains the Windows OS you no longer need:
1. Double-click on “This Computer” to open it;
2. Locate the old system drive, right-click on its icon;
3. Select the “Format” option;
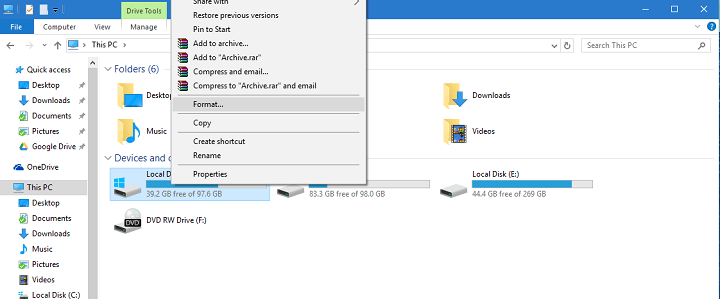
4. Wait for the system to finish the formatting process.
That’s all. Your OS is now situated on the SSD, which will significantly boost its performance.
One more thing is left: namely, it’s time to restore your files from the backup. Most like, they won’t fit on the SSD that now carries your Windows 10. So, the files have to be restored to the freshly formatted HDD. Follow the directions below to safely move your files and avoid system errors.
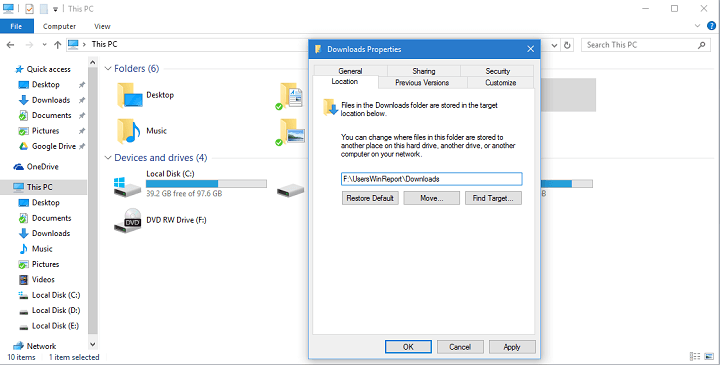
Go to the empty HDD and create a folder in which you will place your files. You can give it whatever name you like, but in this tutorial, it’s named WinReport. Next, go to C:Users
The very last thing on your to-do list is to restore your personal files. Go to the old drive (HDD) and follow these directions:
1. Open the backup location (it may be a cloud storage, another partition of the drive, etc.)
2. Drag and drop your personal files (music, pictures, etc.) to the corresponding folders on the HDD (such as “My Music”).
Please note that you might need to adjust the settings of your games and programs so that the save files for to the “new” My Documents.
That was the last step. The process of moving Windows 10 from an HDD to an SSD is officially successfully complete. Your system is ready to use (and it’ll work a lot fast than before!)