If it’s difficult for you to operate the computer mouse or if this standard manipulator is not at hand at all, you can use the number keys of your hardware keyboard to move the mouse cursor. Below, you will find a detailed description of how to use this Windows 10 feature.
1. To enable and configure the keyboard control, go to Settings → Ease of Access → Mouse. You can search it up in the taskbar by entering “mouse keys”.
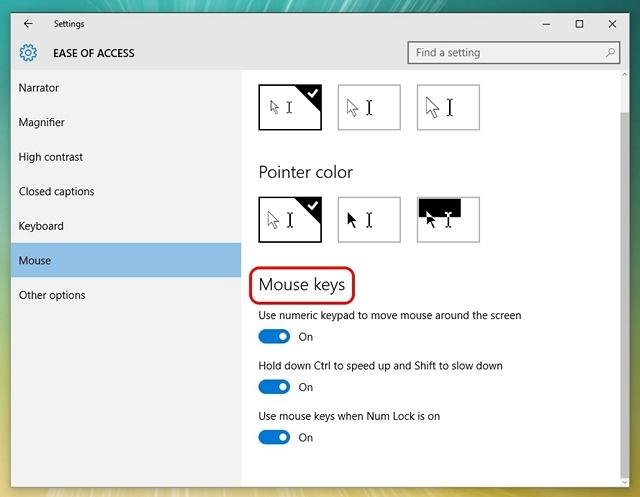
2. To enable this feature, use the only switch in the “Control the mouse pointer with the keyboard” block. Just toggle it into the “On” position.
The user is given the options to control the pointer either only when the NumLock mode is on or always, regardless of the NumLock status. To find out whether or not the Mouse Keys feature is currently enabled, look for the corresponding icon in the taskbar notification area. Click on this icon to access the Mouse Keys settings (for whatever reason, the settings are displayed within the classic control panel). Alternatively, can opt out of having this icon in the taskbar. To do this, simply uncheck the corresponding box.
When you’re using the keyboard buttons, the default movement speed of the pointer arrow is very slow. The convenient sliders will help you adjust the pointer’s speed and acceleration. Optionally, you can hold down Ctrl to accelerate the cursor’s movement – and Shift to slow it down.
3. To move the mouse pointer vertically and horizontally, use the keys 4, 8, 6 and 2. The number keys 7, 9, 3 and 1 are used for diagonal movements. The 5 number key can perform a left or right mouse click. You can switch between these two modes by pressing the / symbol key.